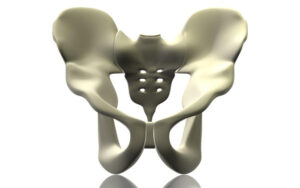

Understanding Hip Joint Adduction: An Approach to PAILS & RAILS
Hip joint adduction is an important movement for anyone practicing ashtanga yoga. It involves bringing the thigh closer to the midline of the body. Proper understanding of this motion can enhance your practice and help prevent injuries.
When we talk about hip joint adduction, we are looking at how this movement affects our overall mobility. Improving your range of motion in the hips can lead to better performance in various yoga postures. But how do we achieve this? PAILS and RAILS are two techniques that can help us.
What Are PAILS and RAILS?
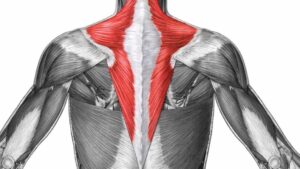
PAILS stands for Progressive Angular Isometric Loading. It helps to strengthen the muscles around the joint while improving the range of motion. You apply pressure in a specific direction, holding the position for several seconds. This creates tension that activates your muscle fibers.
RAILS, or Regressive Angular Isometric Loading, works in the opposite way. After achieving a certain range, you try to engage the muscles to pull yourself deeper into the stretch. This process helps to maintain and even improve the flexibility gained from PAILS.
Together, PAILS and RAILS can be very effective in hip joint adduction. They allow practitioners to work both the strength and flexibility of their hip joints.
How to Implement PAILS & RAILS for Hip Joint Adduction
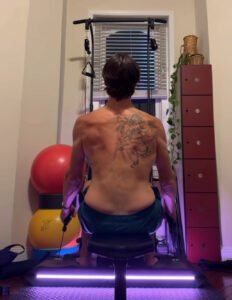
- Setup: Find a comfortable space where you can lie on your back. Place your legs straight out.
- Passive Stretch: Begin by moving one leg outward. You should feel a gentle stretch in the inner thigh. Hold this position for about 30 seconds.
- PAILS:
- Contract the muscles that pull your leg inward against a resistance. This could be a wall, a yoga block, or even your hands.
- Hold this contraction for about 15-20 seconds. Focus on feeling the effort without straining.
- Rest: Rest for a moment once you complete the PAILS phase.
- RAILS:
- Now, switch to engaging the outer thigh and hip muscles. Attempt to pull your leg further to the inside, away from the passive stretch position.
- Again, hold this contraction for about 15-20 seconds.
- Repeat: You can repeat the cycle for 2-3 rounds. Over time, this will help enhance both strength and flexibility.
For more detailed instructions, you can check out this guide on Hip Joint Adduction: PAILS & RAILS.
Benefits of Understanding Hip Joint Adduction
Gaining awareness of hip joint adduction changes how you approach poses like Utthita Trikonasana or Padmasana.
- Increased Stability: A stronger hip joint leads to better control and stability in your postures.
- Decreased Risk of Injury: Understanding how to safely engage your muscles reduces the likelihood of strains.
- Enhanced Flexibility: Over time, with consistent practice of PAILS and RAILS, you’ll notice increased flexibility in your hips, making it easier to get into more challenging positions.
Additional Resources
To see these techniques in action, check out these videos:
Understanding hip joint adduction through PAILS and RAILS can profoundly impact your ashtanga yoga practice. As you improve your hip mobility, you’ll likely find more ease in your practice, allowing you to explore new depths within your asana journey.